Connecting ASCOM Driver Ethernet interface of Gemini 2

This guide will help you get the Ethernet connection working with the ASCOM Gemini.net driver.  Please note that this guide now has been added to section 5 of the Gemini.net ASCOM driver manual. 

Advantages of using Ethernet over other connections interfaces.
  • Able not only control the mount with Ethernet, you can also guide through the same cable.  The UDP protocol used is much faster than USB, provides less load on the computer, and provides for error correction.  You can guide and control the mount with USB or RS-232 (one cable) but it does not provide for error correction and actually loads the computer with an additional driver.
  • If UDP is selected.  The speed is extremely fast, even faster that an USB connection.
  • The ASCOM Driver and ASCOM provides for having many clients connected to the telescope at the same time.  You can have TheSkyX (using the X2 Plugin), MaximDL, PHD guiding using pulse guiding, all connected at the same time, plus many more of ASCOM compatible programs.
  • Guiding through the ASCOM Gemini-2 Driver provides many advantages:
    • The guiding is Synchronous - which means two-way, the Gemini-2 will acknowledge the guiding commands.  Using the Guider  input this is not possible.
    • The program can tell the mount how much to guide, instead of a fixed guide pulse.  The Guider input relies on an interrupt for the RA signal, but a timer for the DEC, which means DEC guiding pulses possibly can be missed if they are too short.  This problem does not exist when using the Ethernet port to guide.
    • No guider cable is necessary, therefore almost any camera can be used to guide as long as you have a driver for the camera.  The camera does not need guider output plug.
    • Less cables means less chances of a ground loop, which can cause possible damage to electronics.  Ethernet has a built in transformer to help isolate it's input, thus preventing ground loops.
Before we get started, You must be able to access the web interface with a web browser.  If you cannot do that, then you will not be able to get the ASCOM Gemini.net driver to connect via Ethernet. Clicking on the address above will test your Ethernet connectivity. (The address above uses http://gemini/ and only works if netbios is working on your system. Otherwise use the IP address shown on your hand controller (Menu-->System-->Network-->IP Address.) The default is 192.168.0.111. You must have the Gemini-2 powered up also. This is only a test to make sure the Ethernet connection is working properly. It has nothing to do with the actual ASCOM to Ethernet Driver.

If you passed the above test, lets get started. Now these instructions only cover configuring the Ethernet in the ASCOM Gemini.net driver. You will need to see the HELP guide included inside the ASCOM driver which covers most everything else. Just use the HELP  or Press F1 - It will bring up the help guide as a PDF.    To find it select Setup, the Help is displayed in the third group down.  Selecting it will bring up the Help PDF file also.
 
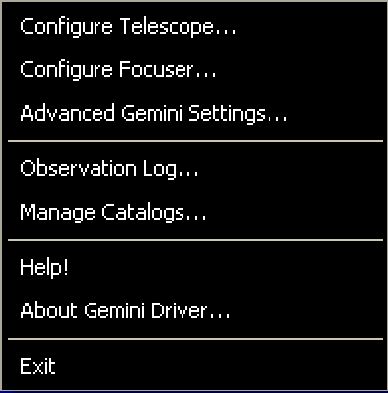
   1.     First Click on the Gemini-2 Icon on your Screen
 
  1. On this menu click on the "SETUP" at the bottom Right of the MENU. This will bring up the next pop-up menu.
  1. Select on "Configure Telescope" from this Menu which is the first selection


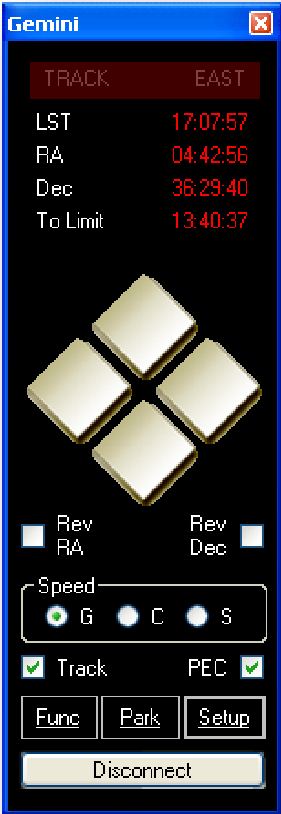
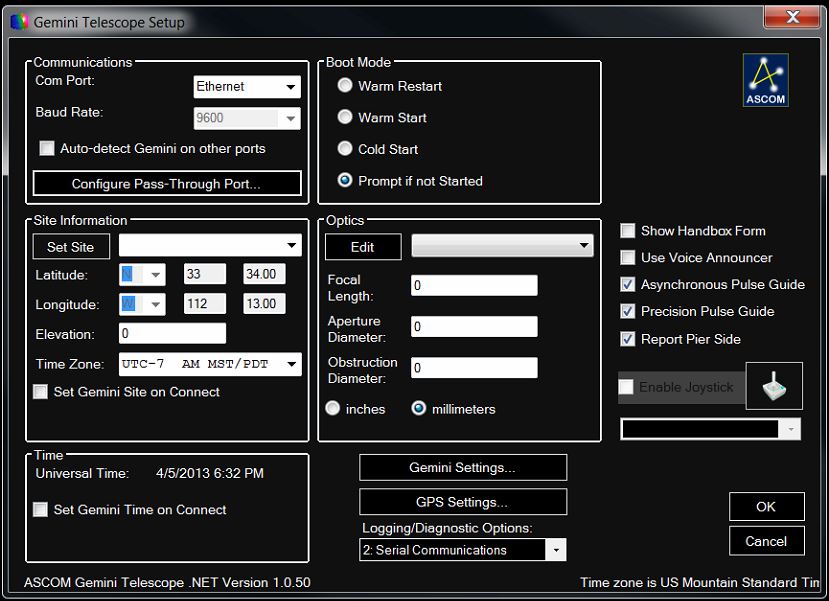
The above setup menu is what you will get if the Gemini-2 has not been detected. Notice you can still see Asynchronous Pulse Guide and Precision Pulse Guide.
But if the Gemini-2 has been detected, you will get the menu below. Asynchronous Pulse Guide and Precision Pulse Guide, are not shown. This is because the Gemini.net driver sets them automatically.
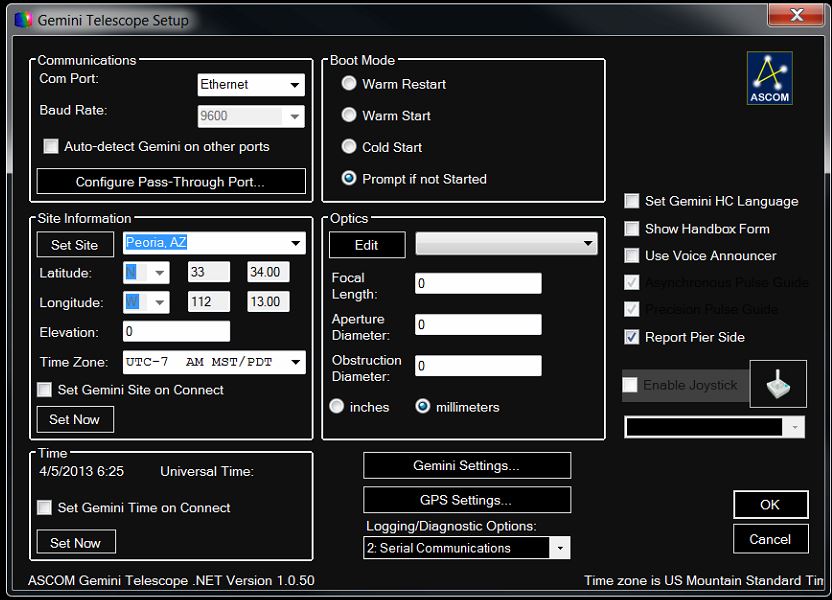
  1. There will be several selections we need to change on this screen.
    1. The ASCOM driver will configure Precision Pulse Guide and Asynchronous Pulse Guide Correctly when connecting to a Gemini 2. See Pulse Guide under the definitions page for an explanation of these, and the image differences above.
    2. On a Gemini one these setting should be Asynchronous Pulse Guide is unchecked, and Precision Pulse Guide is checked. Yes I know that you cannot connect a Gemini-1 via Ethernet.
    3. (Gemini-2 only for this step and beyond.) Now click on the black down arrow to the right of the Com Port list box. In the drop down menu, click on Ethernet. A pop-up window should appear that will let you configure the Ethernet setting. If the window doesn't appear, click on the down arrow again, and again click on Ethernet."


NetBIOS Selected
OR

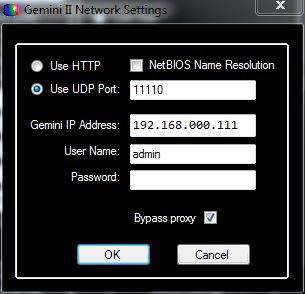
NetBIOS Not Selected
  1. This is the Ethernet configuration window
  2.  
    1. If you cannot connect to the Gemini.net ASCOM driver with the NetBIOS Name Resolution box checked, as on the left picture above, then that probably means that you do not have NETBIOS enabled or working.  That really is the best solution.
    2. But if you cannot use NETBIOS, then uncheck NetBIOS Name Resolution, as in the picture on the right, and in the "Gemini IP address" block enter the IP address of the Gemini-2 Telescope controller as shown on the Gemini-2 hand controller or the Gemini-2 network web page. Do not uncheck "Use UDP port" or change the port number. Do not change User name or password.  Keep Bypass proxy checked, and then click OK.
    3. Please note that some firewalls or Routers might block Port 11110.  If they do, then you need to unblock them. There is no way that I can cover how to do that.  You will have to refer to your firewall or router manual to do that.


Now these instructions only deal with the Ethernet portion of the ASCOM Gemini.net driver.  See The ASCOM HELP pages that is included in the driver it self for the rest. Pressing F1 when the ASCOM Gemini Driver is up will bring up the Help.
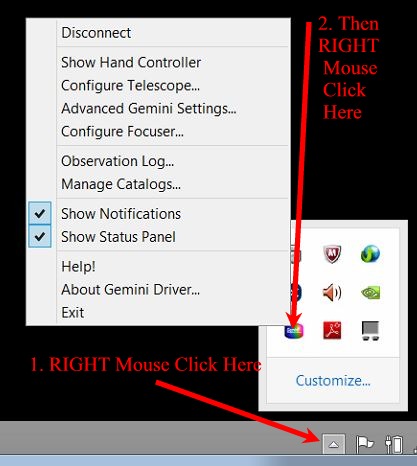