Please note that yours might be different. It depends of the version of the firmware you are running.
a login box will show up. Here is a video showing the process of accessing the web interface
Please note: Some browsers try to connect using a secure connection, https:// This will not work with the Gemini-2. It has to start with http://
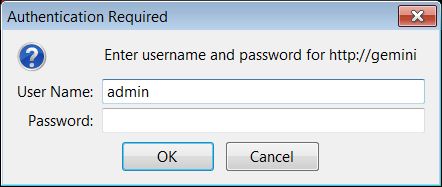
Enter Admin for the User Name, and leave the password box blank. Hit OK.

Each of the Blue names are a Link into another web page. Click on the name to go to that page. Note each link opens as a separate page.
- State - a page that shows the current state of the mount
- Hand Control - a small hand control program that gives limited control and Go functions.
- Functions - GOTO Coordinate Input, Physical Position Park/Sleep/Wakeup and reboot mount, plus Manage parking modes, PEC control, Classic Hand Controller mode, (Note: this has to be either in Photo or All Speeds mode for the mount to auto guide) and tracking speed selection.
- Catalogs -(Previously called Objects) This is a list of all the targets above the horizon in all the catalogs of the Sky. It also provides a Go-To function.
- Mobile Hand Controller - this interface was written by a third party, (who has moved on to building his own mounts). It provides an interface that sizes itself to a mobile phone or tablet and was designed to work from either Android or IPhone devices using the web browser on these devices.; It does provide for using the built in GPS of these devices to update the site info. Because this is wrote by a third party you use it at your own risk.
- Mount - This is where the mount Parameter setup, including mount design, mount type, Gearing, Slew, Move, and Centering Speeds are entered. Also the Safety Limits canbe set on this page.
- Site/Time - This is where you can enter the time in either Local time or UTC. You can also define the sites that come up on the hand controller. There is also a button to Query a GPS receive if it is connected to serial Port one. You can also Query an external NISP time server to get time and date.
- Modeling - This is where you can see the model Parameters, change the current model, and store and retrieve models from the micro SDcard inside the Gemini-2 main unit.
- SD Card - here is where you can see the contents of the micro SDcard inside the Gemini-2. You can also upload files into the micro SDcard here. PLEASE NOTE: There is no delete function to erase a file, once it is uploaded to the micro-SDCard. You can also format the complete micro SDcard. You really need to know what you are doing if you use this function. If you do that only FTP functions are left to be able to then update the card, or the Gemini Firmware updated can also still update the card. The other alternative is to remove the card and use a micro-SDCard reader writer to access it's contents.
- Flash - This is the Flash memory menu. You can upload a new NewGem.bin file using this menu. That is all it allows you to do. It does make sure the file is at the root of the micro SDcard. The SDcard menu will also let you do that, but you have to select the location to load it to.
- NetWork - This is where you can see and set the current and stored setting for all networking parameters.
- Access - This is where you can add a password to the Web interface.
- Serial Ports - This is where you can set the baud rate for the serial ports. Please note that Serial Port Baudrate need to be 57600 if the hand controller is going to work.
- Statistics - This is the TCP Socket status page. It is read only.
- Battery, Ports - This page shows the Power Supply voltage and the Internal Lithium Battery voltage (a CR2354 replaceable battery) Also show is the pin status of all the ports. To see the pin status Periodically you will have to select Periodic Port E usage can also be defined on this page. To use any of the Port F pins, they have to be checked. But it seems that this state is not retained after leaving the page.
- Firmware/Sram - This is the page where you can see what current firmware is installed. Please note that we normally go by the build date to determine the firmware version. This menu also allows for flashing the NewGem.bin file into the main processor. The NewGem.bin file contains all of the Gemini-2 instruction and code. There are many other files that reside on the micro SDcard, and in the Internal SRAM (battery backed up) that must to there for proper operation of the Gemini-2. You can also store the SRAM contents into the micro SDcard for later retrieval.
- Servos - This page allows you to see the Motor State and setting, and allow you to set the Thresholds for the warning messages shown on the hand controller. Please be very careful when you set these setting as you can damage the motors or motor drive circuits, if set wrong.
- Serial Command Set - This is a listing of all the serial commands that the Gemini-2 accepts, through it serial port, USB port, Ethernet Port, and from the Graphics Hand controller.
- Videos By Scott Losmandy - The 15 videos that Scott Losmandy produced to show how to use the Gemini-2, Position the mount to CWD, and use the Polar Scope Illuminator are stored on the micro SDcard, and with an external web browser connected through the ethernet port, they can be view directly from the Gemini-2 micro SDcard.
- Please note that at the bottom of each screen is a selection for Night mode - Day mode. Click night mode on the above image to see an example of what night mode would look like. In this tutorial, this is the only page that has a night mode screen shown. The Gemini-2 has night modes for all screens.
- On the bottom of each page, except "Hand Control (HC)", "Mobile Hand Control (MHC)", "Serial Command Set" and "PAA Tutorial" there should be a "HOME" button, use that to return to this page.
| If your Gemini-2 is connected Via Ethernet, turned ON, and Responds to http://gemini then this link will open this page in the Gemini-2 web interface, after prompting for a log-in. |