Using a GPS receiver
I only know of three GPS receivers specially made for the Gemini Series for mount controllers. I have also listed two alternatives to actual GPS receivers connected into the Gemini-2 at the bottom of this page.

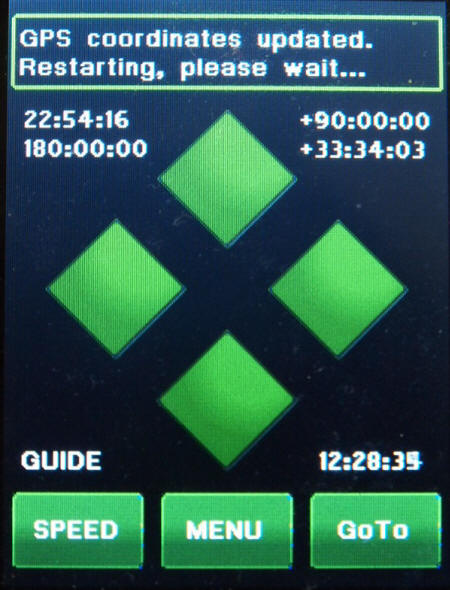
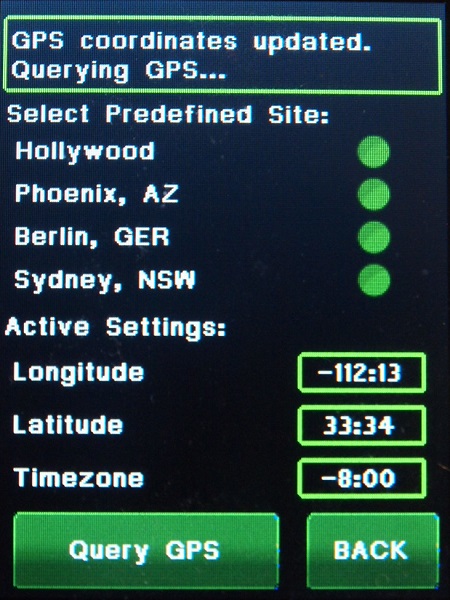
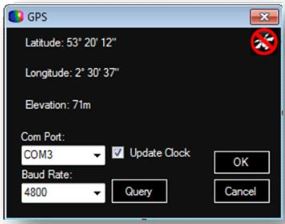
What Information does the GPS receiver provide:
1. Longitude
2. Latitude (the Gemini-2 uses this to determine Northern or Southern Hemisphere automatically.)
3. Time/date in UTC  (All GPS receivers only provide time in UTC/date and does not provide local time/local date to the Gemini-2.  Now if you have the Timezone set correctly, including daylight saving time, then the Gemini-2 can calculate the local time/date and display it on the hand controller.  If the timezone is set to zero then the Gemini-2 will display UTC Time/Date on the hand controller. Either way, the Gemini-2 will calculate proper star positions.  It will do so, even if the timezone is set incorrectly if using a GPS.  All that matters is that the Gemini-2 have the correct UTC Time and Date, Longitude and Latitude which it gets from the GPS Satellites.)
4. Where the GPS data is valid or not, and if not valid, the data is not used.

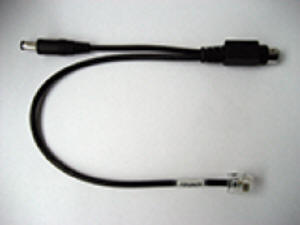
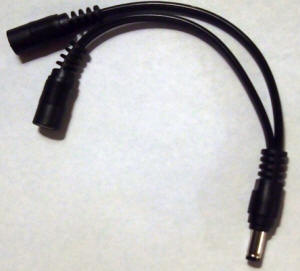
Losmandy makes only the GPS receiver for the Gemini-2, the one for the Gemini-1 has been discontinued. You can see the one for Gemini-2 on Losmandy Accessory Page. This is a picture of the Gemini-2 Version.
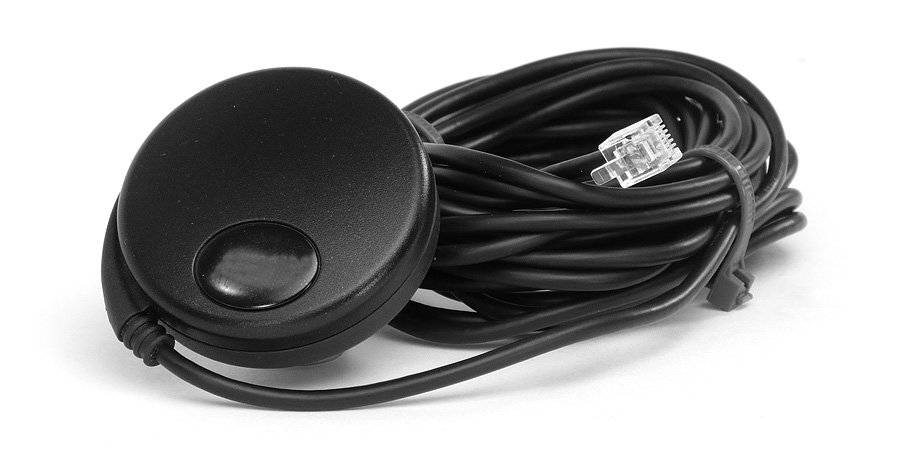
 The one for the Gemini-1 has a part number of GCC, and the one for the Gemini-2 has a part number of GCC-2. Please note that the GPS for the Gemini-1 will not work on the Gemini-2
  • If you are really good at modifying cable, there are instruction in Gemini-2 Users group in message 5225.  that tells how to modify the Gemini-1 GPS for use on the Gemini-2. I take no responsibility and you do this modification at your own risk.  I don't have either version, so no instruction are given here, and I cannot and have not tested the modifications.
The StarGPS unit by PixSoft, Inc. is a 65 channel GPS unit, It comes with one adapter included in the price. For use with a Gemini-1, Gemini-2 or Gemini-2 Mini,   The New Gemini-2 Mini has only one power connector.  So if you order the GPS for it you will also get the cable for the Original Gemini-2 plus the Y Splitter cable shown below. 

The star GPS itself


The G2 Adapter cable


Y Splitter cable for G2 Mini
the wires are 18 Gauge.
PixSoft has adapters for the Gemini-1 that used telephone style motor cable, the Gemini-1 that has round motor cables, and the Gemini-2.  All of them uses the same GPS, but with a different adapter.  This new 65 channel NX02 unit is very sensitive, and the unit I have even works from inside my house.

USB adapter for StarGPS
This same GPS can also be used with a USB adapter so that you can plug it into your laptop.  The ASCOM Gemini.net driver then can read it and pass the setting into the Gemini 1 or Gemini-2.  This is the way I prefer to get GPS information into my mount, and also my observing programs. You may need a Windows Driver to allow this adapter to work. They are listed under GPSView in paragraph 1 at this link. They make the USB adapter have a virtual com serial port emulation, so that most any program looking for the GPS as a serial device will find the starGPS.  You do need to let it go into the NMEA mode first.  See Useful programs in the menu, then, GPS related programs to enhance your use of this adapter, and the StarGPS.
 
Configuring the Gemini-2 for a GPS receiver
  • The default baud rate that the Gemini-2 uses to detect a GPS is 4800 baud. The Gemini-2 main unit, after being powered up will go out the selected serial port (normally Serial port 1) and try a detect if a GPS is connected and get the GPS coordinates. Now the success of this may or may not be displayed on the Hand controller at the top. Normally the messages will be "GPS coordinates updated" or "No GPS data Received"
  • When they will be displayed on the hand controller:
    • When the Gemini-2 is set to be started up in "warm start."
    • When the Gemini-2 is set to be started up in "warm restart."
    • When a manual query is initiated from the hand controller site menu. 
    • When a manual query is initiated from the Web interface  Site/Time at the bottom of the page.  The results can also be seen on the state page of the Web interface.
  • When will they not be displayed:
    • When the Gemini-2 was booted in the "Ask if Possible" mode where the Quick Start, Cold Start, Warm Start, or Warm Restart selections are shown.
    • When the Gemini-2 is started up in the Cold Start mode, where the Polar Align Assist, Modeling, or Catalog Tour menus are displayed.
  • Configuring the GPS baud rate and the Serial port to detect the GPS on:
    • The GPS baud rate is set at the bottom of the Serial Ports where it says Set GPS Baudrate. Do not change the serial port 1 or serial port 2 baud rates as that will not effect the GPS at all.
    • The port where the Gemini-2 will look for the GPS is selected on the Site/Time menu at the bottom of the page.  Normally this will be serial port 1.
Instructions for each make of GPS Receiver
Losmandy Brand - Use with Gemini-2:
  1. The Gemini-2 Losmandy GPS plugs into the Serial port of the Gemini-2 main unit. This is normally serial port 1.
  2. Plug in the GPS and power on the Gemini-2.  You have three options to get the the Gemini-2 to read the GPS receiver.
    1. Go into the site menu and select "Query GPS". This is the recommended method. The GPS will not normally return Coordinates updated, if the Gemini-2 has just been powered up, This is because almost all GPS takes a few minutes to acquire the satellites.
    2. Use the Web interface and Select "Query GPS" at the bottom of site/time page:
      1. Here are four commands that you can click on from this web page to select which serial port and which baud rate the Gemini will try to use for commanding the GPS receiver. Of course the Gemini-2 must be connected via Ethernet, and responding to web commands for them to work.
        1. 4800 baud  - This will make the baud rate for the GPS 4800 baud.
        2. 9600 baud  - This will make the baud rate for the GPS 9600 baud.
        3. Serial Port 1  - This is the same as using the Query GPS Receiver for Serial port 1
        4. Serial Port 2  - This is the same as using the Query GPS Receiver for Serial port 2
    3. If you have not logged into the Web interface, then clicking on one of the above links will bring up the log in box.
    4. Cycle power to the Gemini-2.
StarGPS Brand - Use with Gemini-2:
  1. Turn the Gemini-2 Power switch off. Plug the StarGPS GPS plugs into the Serial port 1 of the Gemini-2 main unit, and the second power plug on the right side of the main unit, or if a Gemini-2 Mini, use the included Y Power adapter cable to power the StarGPS and the Mini at the same time.

  2. Have power being supplied to the Gemini-2 with the Gemini-2's power switch off, so that the GPS will be powered up, but the Gemini powered down. The reason for this is that the GPS in the first 45 seconds tries to determine the type of mount it is connected to.  Since the Gemini can respond with some Meade LX-200 commands, the GPS will think it is connected to a LX-200 instead of a Gemini.  If this happens then it will never go into the NMEA mode, which is the ONLY mode the Gemini-2 (or Gemini-1) will read GPS data in. 

  3. Watch the light on the GPS unit.  It will stay solid green for about 45 seconds.  It will then start blinking very fast for about 5 seconds. (It has now switched to the NMEA mode) Wait until it blinks once every 2 seconds (Indicating that it has a location fix)

  1. Power on the Gemini-2 unit. The Gemini-2 should now automatically get the GPS coordinates from the GPS. Where the Gemini 2 displays a message will be determined by the above boot modes in Configuring the Gemini-2 for a GPS receiver paragraphs above. An alternate method is to not plug the GPS into the serial port until it has switched to the NMEA mode. You would use this if the Gemini is already powered up and you do not want to power it down.  You will have to use one of the below methods to get the Gemini to read the GPS in this alternate method.

  1. You have three options to get the the Gemini-2 to read the GPS receiver, if it did not read the GPS in step 4 above.
    1. Go into the site menu and select "Query GPS" this is the recommended method if the Gemini-2 failed to read the coordinates in step 5 above.
    2. Use the Web interface and Select "Query GPS" at the bottom of site/time page:
      1. Here are four commands that you can click on from this web page to select which serial port and which baud rate the Gemini will try to use for commanding the GPS receiver. Of course the Gemini-2 must be connected via Ethernet, and responding to web commands for them to work.
        1. 4800 baud  - This will make the baud rate for the GPS 4800 baud.
        2. 9600 baud  - This will make the baud rate for the GPS 9600 baud.
        3. Serial Port 1  - This is the same as using the Query GPS Receiver for Serial port 1
        4. Serial Port 2  - This is the same as using the Query GPS Receiver for Serial poet 2
      2. If you have not logged into the Web interface, then clicking on one of the above links will bring up the log in box.
      3. Cycle power to the Gemini-2.
Note: StarGPS units NX01 and Early Releases of the NX02 used 9600 baud.  If you cannot get your GPS to function, then you might try changing Serial Port 1 to 9600 baud. See the Gemini-2 Web interface for changing it to 9600 baud on the serial ports web page.  If you are connected to a Gemini 2 with an Ethernet connection
This command 4800 baud should set it to 4800 baud, and this command 9600 baud should change it to 9600. baud.
 
Alternatives to GPS receivers plugged into Gemini 1 and Gemini 2
 
Alternative  1. Now the ASCOM Gemini.net driver can connect to a GPS that is connected directly to the computer.  You can use a USB GPS receiver directly into your computer.  Most USB GPS receivers will create a virtual Serial port that the ASCOM Gemini.net driver can read.  Once the ASCOM Gemini.net Driver has the data from the GPS receiver, it can pass it directly to the Gemini-1 or Gemini-2.   From the ASCOM Gemini.net manual:

GPS Settings This button provides access to the GPS configuration form. You configure the port number and speed of the serial port on your PC to which the GPS is connected. There are options for automatically updating the PC clock as well as the location data from the GPS, and manually performing a query.
AscomGPSsetting
Ensure that your GPS is set to output NMEA data at the same serial speed, and is not set to SiRF or some other proprietary protocol. This form only updates from the GPS when you press the [Query] button whilst it is updating, the Query button will change to [Stop]. Pressing either the [Stop], [Cancel], or [OK] button will halt the GPS update. Pressing either the [OK] or [Cancel] button will close the form. The icon in the top right hand corner of the form indicates if the data being received from the GPS is reliable or not
 
Alternative 2. Also the Web interface has a tab called Mobile Hand Controller. This is an unsupported program, but it does offer some nice features. The one I like is being able to use the GPS of a Cell Phone or Tablet to update the Site/Time data of the Gemini-2.  After opening it up, go to Menu and Select "Site".  If the program detects a GPS then it will allow you to update the Gemini-2 with the GPS coordinates from the Cell Phone or Tablet.
 
If you would like to use your cell phone to get the GPS coordinates, I know of an Android App that does this and also provides the coordinates in the correct format for the Gemini-2.